This is the third article in the series of articles about how to create workspace and share the workspace.
Previously we explained how to create the workspace and add Tile to the workspace.
Here we are going to explain how to add List to the workspace and how to share the workspace.
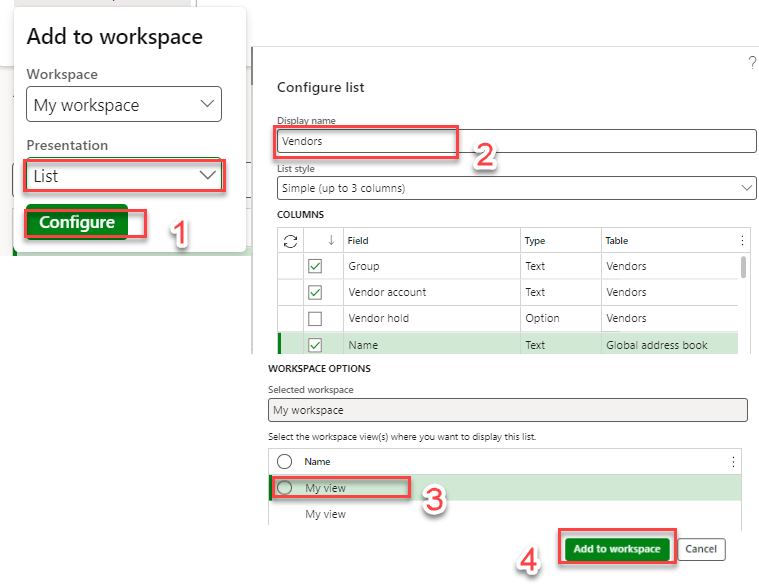
The user also wants to have Vendors in his workspace but this time the user chooses to see them as List. Again, go to Account payable > Purchase order > All Purchase orders. In the Action pane we choose Options > Personalize > Add to workspace. Here we add the name to the List and choose which field to be displayed in the list, as shown in the picture below.
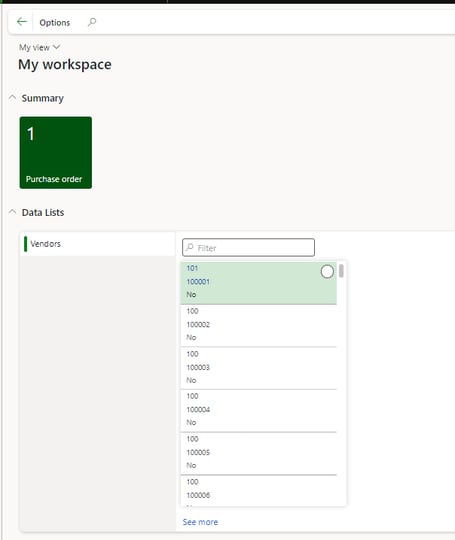
In the workspace now, we can see the Vendors shown as list.
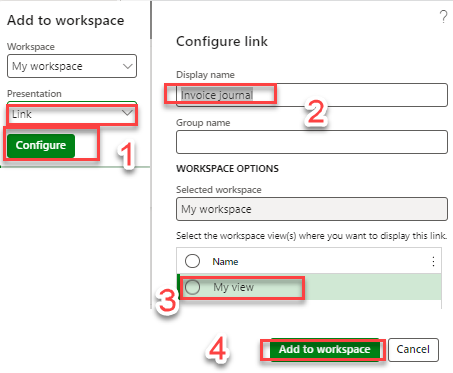
Next, users choose to add Invoice journals, this time as Link. The steps are the same as for the tile and list.
Account payable > Purchase order > All Purchase orders. In the Action pane I choose Options >Personalize > Add to workspace.
We name the Link and add it to the workspace.
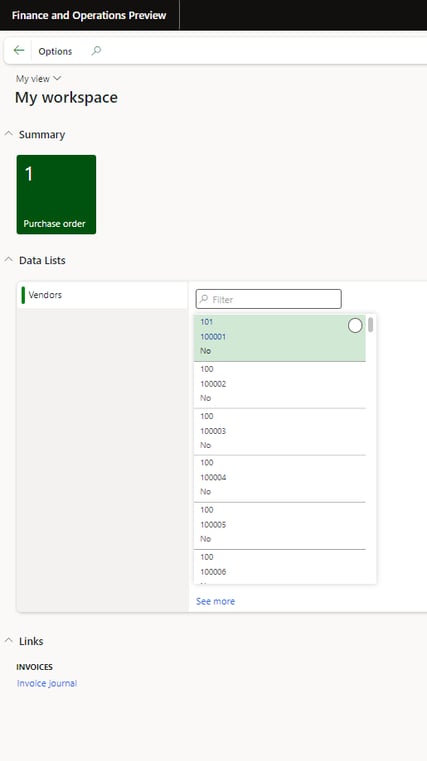
In his workspace user can see Purchase Orders as Tile, Vendors as List, and Invoice Journal as Link.
In the next article we are going to explain how to share the workspace with other users or roles in your organization.
Thank you for reading this article. I hope you like it and see it useful for your organization or implementation.
If you have any questions or suggestions, please do not hesitate to contact us.