.jpeg)
When dealing with journals that have a lot of data lines, the best way to manage it is by opening the journal lines in Excel. Dynamics 365 Finance and Operations (D365 FO) provides this functionality, which is incredibly useful. However, frequently, the standard templates need adjustments to meet specific business requirements.
Let us take the example of working with the General Journal. I need to load lines containing the main account, financial dimensions, and the offset account along with its financial dimension. The issue here is that the standard template only includes the main account without financial dimensions and the offset account without financial dimensions, as seen in the picture.

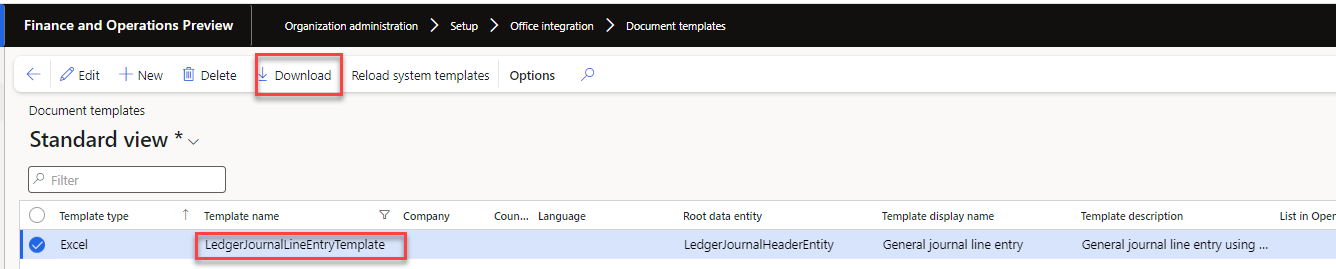
The first step is to navigate to Organization Administration -> Setup -> Office Integration -> Document Templates. To ensure we are working with the correct template, the best approach is to check the entity name from the "select template" window or from the opened Excel file. 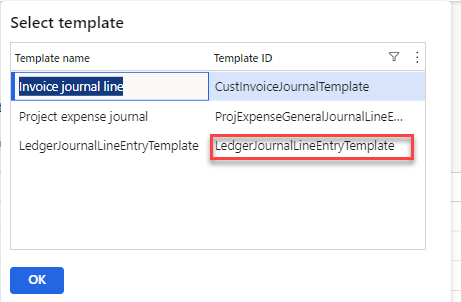
Once we identify the template, we download it.
In the Excel file using the Excel add-in, we click on "Design," and in the table of Journal Lines, we click the "Edit" button.
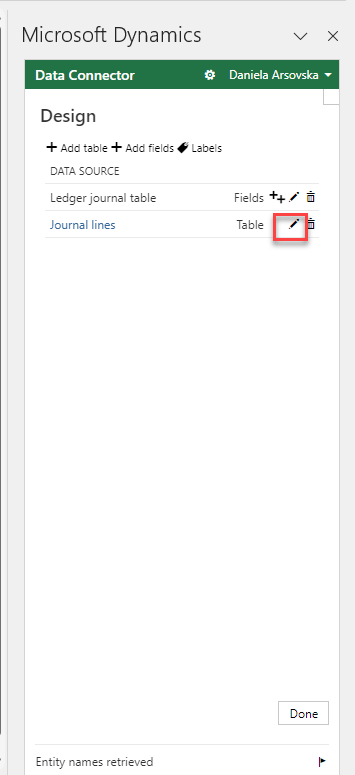
In the "Select Files" area, we add two new fields: AccountDisplayValue-Account and OffsetAccountDisplayValue-Offset account. We can adjust their position using the arrows. After making these changes, we save the template and return to Organization Administration -> Setup -> Office Integration -> Document Templates.
Most importantly is to save this template but with the same Template name, Template display name and Template description and format, as the previous one. If you provide a different template name, then the system wouldn't be able to recognize that this template is for General journal lines.
As for this example ledgerJournalLineEntryTemplate.xlxs.
Here, we choose to delete the previous template, then press "New," and upload the modified template we just created.

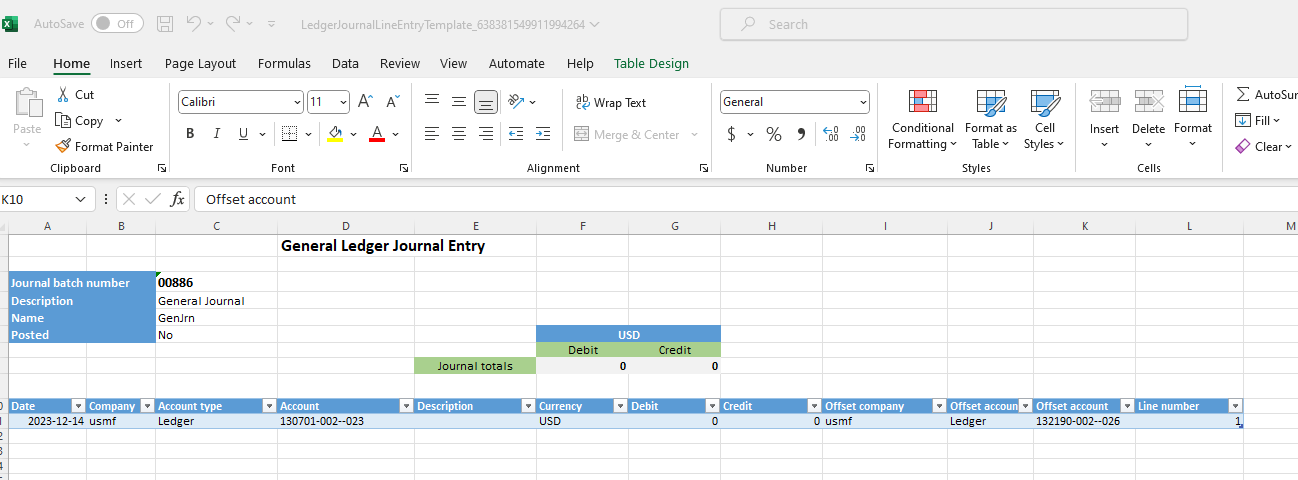
This is how our new Excel template looks like:
If we want the template to be specific to a particular company, during the upload, we specify the company:

I hope you find this article helpful. If you have any questions or suggestions, please feel free to reach out to us. If you like this article, let us know!